Hardness Testing
This is an attempt to briefly explain the mechanics of how a hardness tester works. Hardness testing can be done with many different tools. There are simple hardness files, Rockwell hardness testers, and also Micro-hardness testers. I will briefly describe and tell the uses for each one.
A hardness file is just what it sounds like. These files are created at different hardness levels. When you try to file the surface of the specimen that you are testing, if the file scratches the surface then the material is softer than the file that you used. Likewise, if the file that you use does not scratch the surface of the specimen then the material is harder than the file. These tools are useful when the specimen that you are testing cannot be placed into one of the other types of hardness testers. It is also good for quick checks on materials where the exact hardness value is not critical.
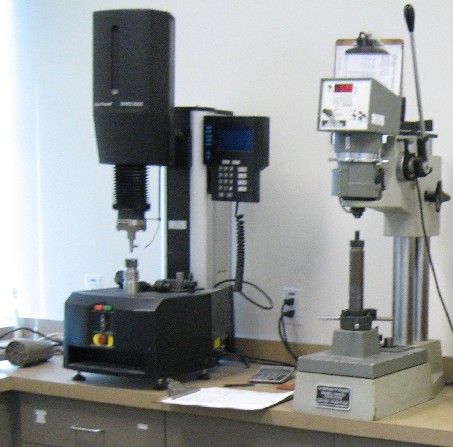
The second tool is probably the most familiar tool to people. The Rockwell hardness tester (shown below) uses a penetrator, usually a diamond or steel ball, to check hardness. The penetrator is pressed into the specimen with a predefined weight or load. This load is defined by the scale in which you have chosen to do your test. For example, if you wish to test your specimen on the Rockwell C Scale, then you would set your load on the tester to 150kg and would choose the correct size penetrator. Once the load is presented to the specimen the machine is then released from the load. The machine then measures how deep the penetrator went into the specimen. This measurement is then displayed as a relative hardness reading. As I mentioned earlier this is the most commonly used tester for measuring hardness.
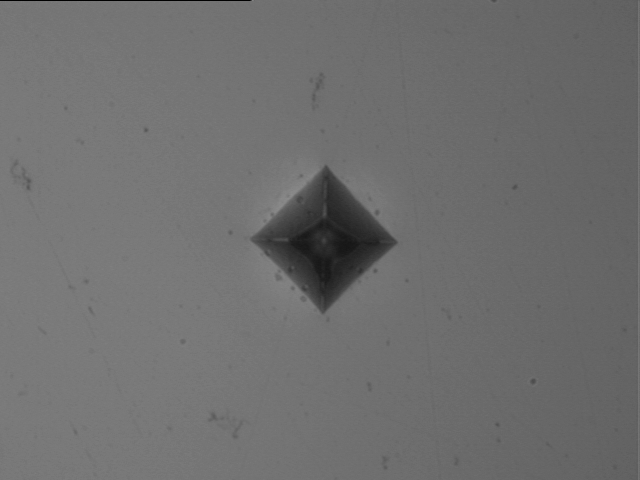
Finally, the Micro hardness tester is the most accurate measurement for hardness. This is used when precise hardness measurements are required. The basic operation of this machine is the same as the Rockwell testers except the loads and the actual depth measurements are different. The penetrator is pressed into the load at a predetermined weight. Then the specimen is viewed through a microscope (see below). In the microscope you can see the impression left by the diamond. This impression is then measured in two directions when using a Vickers diamond. These measurements will then correspond to a specific hardness value.
Bob Puls
President
Zion Industries, Inc.


